Trade Me API OAuth Java example
Overview
Trade Me is the most popular online auction e-commerce website in New Zealand, which features things very much like eBay. As an e-commerce platform, Trade Me provides APIs for third-parties vendors to spark their own ideas on top of Trade Me platform powerhouse.
The API reference manual is as follows: http://developer.trademe.co.nz/, in the reference, among others, the authentication way on basis of OAuth is very complicated, check the following link for details: http://developer.trademe.co.nz/api-overview/authentication/example-oauth-flow/, unfortunately, Trade Me API manual doesn't contain vivid code examples to simplify the understanding.
In this article, I will list all of steps with code snippets for Trade Me OAuth flow to make it vigorous in force, therefore, projects which lies on Trade Me API are easy to get started, especially for Java.
Please be aware, trade me adopts OAuth 1.0 as authentication mechanism which is not compatible with OAuth 2.0. OAuth 1.0 seems declining, google deprecated OAuth 1.0 several years ago. For more information about OAuth 1.0, you can look at this http://oauth.net/.
Prerequisite
This example is based on Trade Me sandbox site.
Go to https://www.tmsandbox.co.nz/Members/Register.aspx to register a Trade Me test account.
After registration, use newly created username/password to login the Trade Me sandbox https://www.tmsandbox.co.nz/Members/Login.aspx, then add one item to watchlist.
Then go to My Trade Me > My Trade Me API applications > Developer options > Register a new application, the link is https://www.tmsandbox.co.nz/MyTradeMe/Api/RegisterNewApplication.aspx. We are about to register a new application.
Next, go to https://www.tmsandbox.co.nz/MyTradeMe/Api/DeveloperOptions.aspx or My Trade Me > My Trade Me API applications > Developer options to find the registered application's credential.
At last, let's note down four parameters created in above procedures and be in line with OAuth terminology.
Go to https://www.tmsandbox.co.nz/Members/Register.aspx to register a Trade Me test account.
 |
| register a Trade Me test account |
After registration, use newly created username/password to login the Trade Me sandbox https://www.tmsandbox.co.nz/Members/Login.aspx, then add one item to watchlist.
 |
| Watchlist |
Then go to My Trade Me > My Trade Me API applications > Developer options > Register a new application, the link is https://www.tmsandbox.co.nz/MyTradeMe/Api/RegisterNewApplication.aspx. We are about to register a new application.
 |
| register a new application |
Next, go to https://www.tmsandbox.co.nz/MyTradeMe/Api/DeveloperOptions.aspx or My Trade Me > My Trade Me API applications > Developer options to find the registered application's credential.
 |
| consumer key & consumer secret |
At last, let's note down four parameters created in above procedures and be in line with OAuth terminology.
- username: xxx@xxx.xxx -- created in user registration
- password: xxxxxxxxxxx -- created in user registration
- consumer key: xxxxxxxxxxxxxxxxxxx -- created in application registration
- consumer secret: xxxxxxxxxxxxxxxxxx -- created in application registration
Among others, username and password is the credential of Resource Owner and consumer key and consumer secret is the credential of Client to consume the Trade Me API on Server.
Sample web application calling a Trade Me API based on OAuth
We will build a web application on basis of tomcat to call an API(watchlist API) for demonstration, we have following definitions:
- Client: the sample web application deployed on tomcat.
- Server: the application server where Trade Me APIs are hosted.
- Resource Owner: a registered user on Trade Me sandbox site.
- Browser: the user interface to access the sample web application.
- User: the registered user sitting in front of the browser.
- A user uses a browser to access the client to do something related to Trade Me resources access.
- The client accesses the server to generate a temporary request token.
- The client generates the authorisation URL.
- The client redirects the browser to an authorisation page on the server.
- The user grants Trade Me resources access privileges to the client.
- The Trade Me server redirects the browser to the client.
- The client accesses the server to generate an access token.
- The client calls the Trade Me API to get a member's watchlist.
Among others, step 2, step 7, step 8 are the paramount ones since all of them are required to interact with server and there is a very complicated handling shared in common. This handling is too intricate and error-prone so that the community just moved away from OAuth 1.0 to OAuth 2.0, which is called generating authorisation header.
Generate Authorisation Header
This procedure takes place in the steps before calling real API and occurs in every API call. Let's analyse it by the real code.
In this method, it takes so many parameters to process in order to generate an authorisation header occurring in http requests. Under the hood, there are several sub methods worth attention:
   /**
   The most important and complicated method in OAuth flow
   @param httpMethod
   @param url
   @param oauthConsumerKey
   @param oauthTimestamp
   @param oauthNonce
   @param oauthToken
   @param oauthCallback
   @param oauthVerifier
   @param oauthConsumerSecret
   @param tokenSecret
   @return authorization header
    */
   private String generateAuthorizationHeader(String httpMethod, String url, String oauthConsumerKey, String oauthTimestamp, String oauthNonce, String oauthToken, String oauthCallback, String oauthVerifier, String oauthConsumerSecret, String tokenSecret) {
     //base http method
     String baseHttpMethod = httpMethod;
     //base url
     String baseURL = encodeParameter(processRequestURL(url));
     //base parameters
     Map<String, String> oauthParams = generateOAuthParameters(oauthConsumerKey, oauthTimestamp, oauthNonce, oauthToken);
     Map<String, String> extraOauthParams = generateExtraOAuthParameters(oauthCallback, oauthVerifier);
     Map<String, String> queryStringParams = generateQueryStringParameters(url);
     Map<String, String> sortedParams = new TreeMap<>();
     sortedParams.putAll(oauthParams);
     sortedParams.putAll(extraOauthParams);
     sortedParams.putAll(queryStringParams);
     String baseParameters = encodeParameter(encodeParametersToString(sortedParams, "&", false));
     //combine all
     String oauthBaseString = baseHttpMethod + "&" + baseURL + "&" + baseParameters;
     //generate signature
     String signature = generateSignature(oauthBaseString, oauthConsumerSecret, oauthToken, tokenSecret);
     //generate header string
     oauthParams.put("oauth_signature", signature);
     String result = "OAuth " + encodeParametersToString(oauthParams, ",", true);
     return result;
   }
In this method, it takes so many parameters to process in order to generate an authorisation header occurring in http requests. Under the hood, there are several sub methods worth attention:
- processRequestURL
- generateOAuthParameters
- generateExtraOAuthParameters
- generateQueryStringParameters
- generateSignature
- encodeParameter
- encodeParametersToString
Let's pick up some to highlight:
processRequestURL
   /**
    * Remove query string and default ports, lowercase base url.
    *
    * @param url
    * @return
    */
   private String processRequestURL(String url) {
     //remove query string
     int index = url.indexOf("?");
     if (index != -1) {
       url = url.substring(0, index);
     }
     //base url to lowercase
     int slashIndex = url.indexOf("/", 8);
     String baseURL = url.substring(0, slashIndex).toLowerCase();
     // remove default ports
     int colonIndex = baseURL.indexOf(":", 8);
     if (colonIndex != -1) {
       if (baseURL.startsWith("http://") && baseURL.endsWith(":80")) {
         baseURL = baseURL.substring(0, colonIndex);
       } else if (baseURL.startsWith("https://") && baseURL.endsWith(":443")) {
         baseURL = baseURL.substring(0, colonIndex);
       }
     }
     url = baseURL + url.substring(slashIndex);
     return url;
   }
This method aims to transform URL to be more formal, see comments for details.
encodeParameter
   /**
    * special URL encoding
    *
    * @param value
    * @return
    */
   private String encodeParameter(String value) {
     try {
       String encoded = URLEncoder.encode(value, "UTF-8");
       StringBuilder buf = new StringBuilder(encoded.length());
       char focus;
       for (int i = 0; i < encoded.length(); i++) {
         focus = encoded.charAt(i);
         if (focus == '*') {
           buf.append("%2A");
         } else if (focus == '+') {
           buf.append("%20");
         } else if (focus == '%' && (i + 1) < encoded.length() && encoded.charAt(i + 1) == '7' && encoded.charAt(i + 2) == 'E') {
           buf.append('~');
           i += 2;
         } else {
           buf.append(focus);
         }
       }
       return buf.toString();
     } catch (UnsupportedEncodingException e) {
       throw new AssertionError("Impossible exception!", e);
     }
   }
This method is intensively applied in many places many times, it's not the encoding in JDK's URLEncoder.encode, it requires slight modification based on URLEncoder.encode. For details, see following link: http://whatwebwhat.com/en/page/350/oauth-and-url-encoding.
encodeParametersToString
   private String encodeParametersToString(Map<String, String> params, String splitter, boolean quot) {
     StringBuilder buf = new StringBuilder();
     params.entrySet().stream().forEach((param) -> {
       if (buf.length() != 0) {
         if (quot) {
           buf.append("\"");
         }
         buf.append(splitter);
       }
       buf.append(encodeParameter(param.getKey()));
       buf.append("=");
       if (quot) {
         buf.append("\"");
       }
       buf.append(encodeParameter(param.getValue()));
     });
     if (buf.length() != 0) {
       if (quot) {
         buf.append("\"");
       }
     }
     return buf.toString();
   }
This method concatenates encoded name value pairs by the splitter to form a string.
generateSignature
   private String generateSignature(String data, String oauthConsumerSecret, String token, String tokenSecret) {
     try {
       SecretKeySpec spec;
       if (token == null) {
         String secret = encodeParameter(oauthConsumerSecret) + "&";
         spec = new SecretKeySpec(secret.getBytes(), HMAC_SHA1);
       } else {
         String secret = encodeParameter(oauthConsumerSecret) + "&" + encodeParameter(tokenSecret);
         spec = new SecretKeySpec(secret.getBytes(), HMAC_SHA1);
       }
       Mac mac = Mac.getInstance(HMAC_SHA1);
       mac.init(spec);
       byte[] byteHMAC = mac.doFinal(data.getBytes());
       return Base64.getEncoder().encodeToString(byteHMAC);
     } catch (InvalidKeyException | NoSuchAlgorithmException e) {
       throw new AssertionError("Impossible exception!", e);
     }
   }
This method generates a signature as a security protection.
Nuts And Bolts For Steps
First of all, we need a Servlet to act as the entry point for the user who accesses the client -- Watchlist.java
This Servlet completes step 1, 4, 5. After redirecting, the user should login with username/password.
Secondly, we need a method to get request token and generate authorisation URL for redirecting
This method completes step 2, 3. Mainly, generating authorisation header and posting request-token request are involved.
Thirdly, we need a callback Servlet to do things after permissions granted from the user -- WatchlistCallback.java
This Servlet completes step 6. This is client's entry point after permissions granted.
Next, we need generate access token and store it for later usage.
This method completes step 7 to send a POST request to server again to acquire a new access token and store it so that every API call can utilise this token.
Finally, we can call the real watchlist API with token-based authorisation.
This method completes step 8, in the method, it generates authorisation header as usual.
Summary
The intact source code can be cloned from this GitHub repository -- https://github.com/Bo-Ye/trademe-api-oauth, after git clone, you can run following maven command to launch it under tomcat container.
mvn clean tomcat:run
Call the watchlist API in the browser:
Redirect to the Trade Me login page to grant permissions:
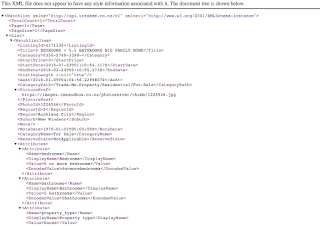
Call the watchlist API and get the result:
 |
| call watchlist API |
Redirect to the Trade Me login page to grant permissions:
 |
| grant user permissions to the client |
Call the watchlist API and get the result:


How would you implement this with Spring boot?
ReplyDelete